If you want to livestream a class then you've landed in the right spot to learn all you need to know. It's now easier than ever to livestream a class from the comfort of – well, anywhere.
From laptops to smartphones, you can pretty much livestream from any gadget packing a microphone and camera combination. That means a class livestream can not only be done immediately, in most cases, but it can also be done for free and from anywhere.
With a host of livestream services vying for your attention, that competition works out well for educators. From YouTube and Dacast to Panopto and Muvi, there are many ways to livestream a class.
Here's all you need to know to getting started so you can livestream a class right now.
- 6 Ways to Bomb-Proof Your Zoom Class
- Zoom for Education: 5 tips
- Why Zoom Fatigue Occurs and How Educators Can Overcome It

Best platforms to livestream a class
A large number of platforms allow you to livestream a class, each with varying benefits. So you first need to decide what it is you want out of your livestream.
If it's a simple video stream, directly from your device to your students, with nothing more, then you may well be served best by the simplicity and universality of YouTube.
However, you may want more advanced features, such as more security or a dedicated CMS, which a platform such as Dacast or Muvi can help with.
Panopto is another great option as it's specifically tailored to education needs. You can livestream a video of yourself but also split the screen to pull in another video feed, perhaps using a document camera to capture an experiment. This also integrates with most LMS and offers great levels of privacy and security, making it ideal for schools.

How to livestream a class using YouTube
The most easy, and free, way to livestream a class is by using YouTube. You will need to sign up for an account with Google, if you don't already have one. Then you can login to your own YouTube account where you will livestream from. The link to this channel can then be shared with students so they know where to go each time you have a livestream class.
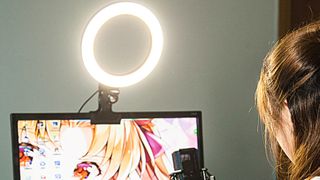
Now it's time to make sure you have the right hardware setup. Does your device have a working webcam and microphone? You may also want to consider the best headphones for teachers and the best ring lights to get the most professional and high-quality finish. Having issues? Check out our guide here: Why does my webcam or microphone not work?
To get live streaming you'll need to verify your YouTube account, which can take up to 24 hours. So be sure to get the initial setup out of the way well in advanced of class day. This only needs to be done the one time.
All you need to do is open YouTube, on app or computer, then go to the top right where you will see a camera with a plus sign in it. Select this then "Go live." This is where you will need to select "Enable" if you're not setup yet.

Webcam or Stream on YouTube?
Once enabled, you can select either Webcam or Stream. The first, Webcam, just uses your camera so you can talk to the class. The Stream option lets you share your computer desktop with the class, ideal for a slides-based presentation, for example.
Title the stream you pick and then choose if its Public, Unlisted, or Private. Unless you want it on YouTube for all, you'll want to select Private. Then in the calendar icon, either leave the toggle for starting right away or slide it across to set a time and date for the class.
Finish up by selecting next and then using the Share option to get a link to share with your students.
The same process applies to the Stream option, only in this case you'll also need an encoder, such as OBS, allowing you to add the picture-in-picture effect of you talking to the class while they follow your desktop presentation on screen. To do this, simply download the encoder and then add the key to your stream settings in YouTube and follow the prompts.
The livestream can be left to be just that, live only. Or, if less than 12 hours long, you can have YouTube archive it for you. This applies to all types of livestream and will be done in up to 4K resolution – making it future-proof to use in lessons to come too.
Best Tips For Live Streaming A Class
Think background
Set yourself up before turning on that camera, meaning think about what's behind you so it will not only avoid creating a distraction – or revealing too much – but could actually help. Science class? Get an experiment setup in the background.
Audio importance
Audio quality is super important if you're going to be talking a lot. Test your microphone before you start and if it's not crystal clear, consider investing in a direct plug-in one to enhance how you sound.
Pull in more
Video is great to get you in front of the students but boost that engagement by using other apps at the same time such as Piktochart or ProProfs.

